This is Zoe’s Hornet costume from Halloween 2021.
Note: I’m writing this about 10 months after the fact, so please excuse any gaps in the process or areas that lack detail or photographs.
Hornet is a character from the video game Hollow Knight, which Zoe enjoys watching me play. It’s one of my favourite games of all time and I’m glad she enjoys it too, even though it’s a bit more difficult than she’s capable of at the moment.
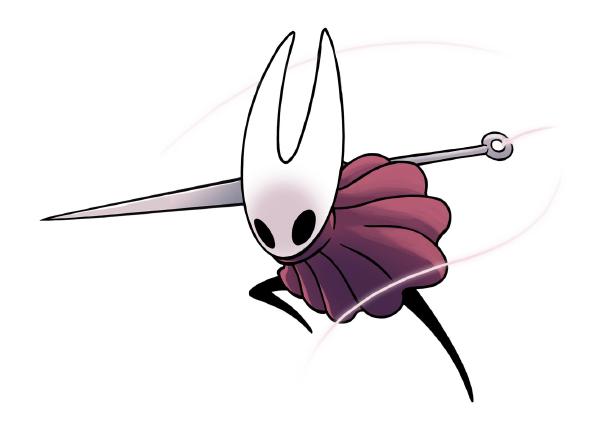
Here’s some official character art of her.
Mask
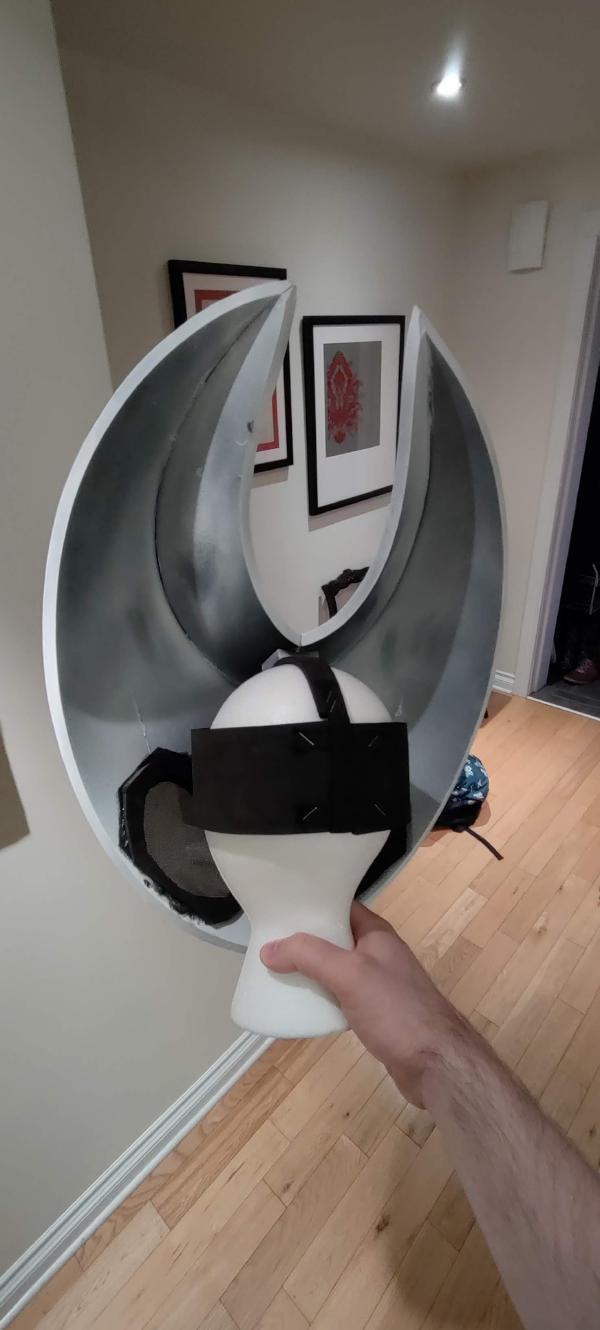
Many of the characters in Hollow Knight wear masks. It’s not clear whether Hornet does or not (since she never takes it off), but since the idea was plausible and a mask would be easier to make, that’s the route I went. Since Hollow Knight is a 2D game, the actual shape of the mask in three dimensions is open to interpretation. I looked at existing costumes for inspiration, but in my opinion most of them failed to capture the smooth curves I was picturing. Instead I based my design on this render of Hornet. I liked how the face had a single ridge running from the tip of one horn, across the top of the face, and back up the other side.
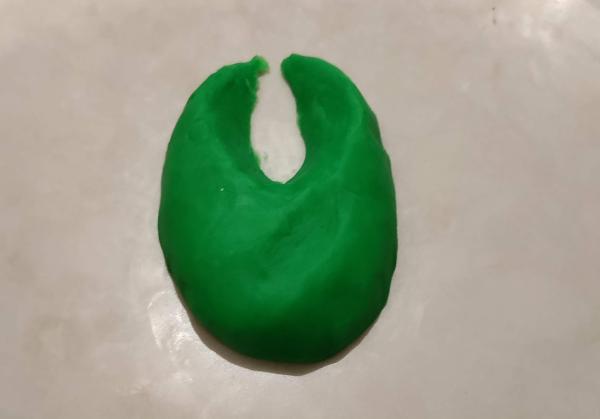
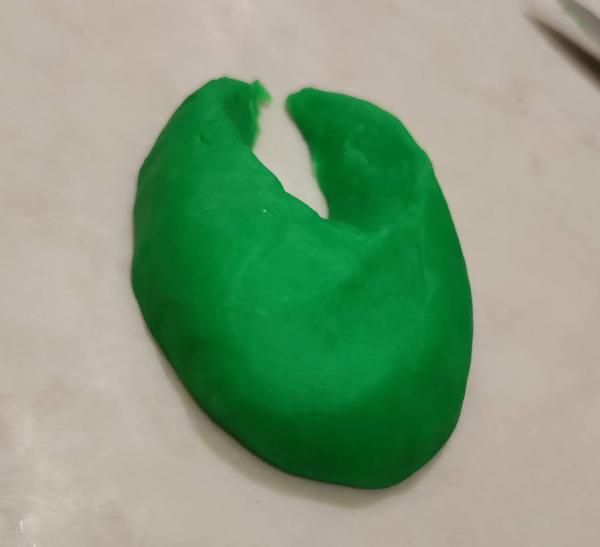
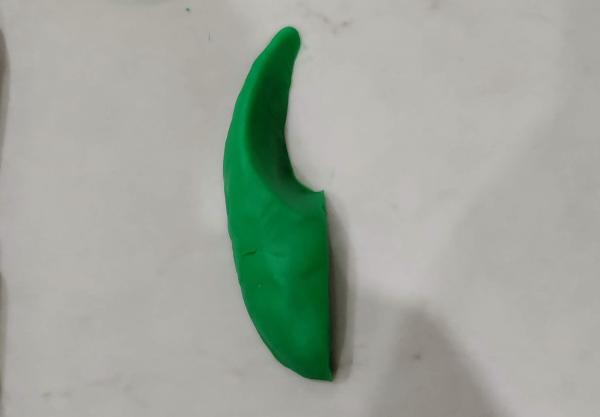
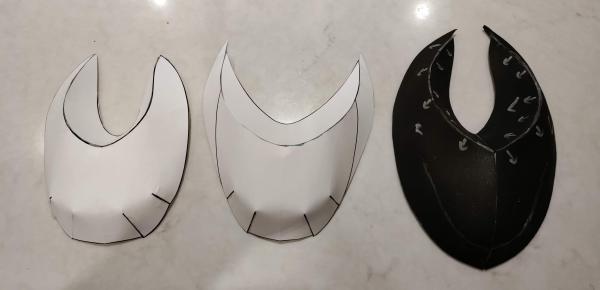
Since the mask has no straight lines anywhere on it, designing the pattern was difficult. I started by making a couple of miniature versions out of playdough (since that’s what I had on hand) and then taking a pattern from them using cling-film and painters tape.
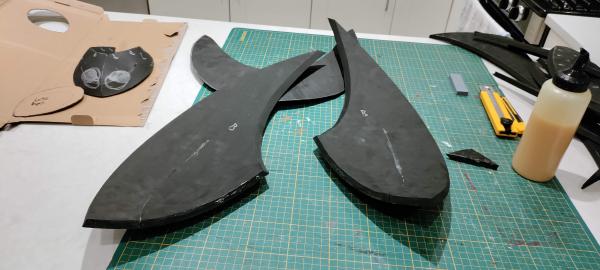
I scanned these, blew them up a little and made paper prototypes that were about 15cm tall to see if the pattern worked at a larger size. It took a few iterations and re-designs until I was happy with the result. Before going full-size I made a small foam version to make sure it would still work in the actual material.
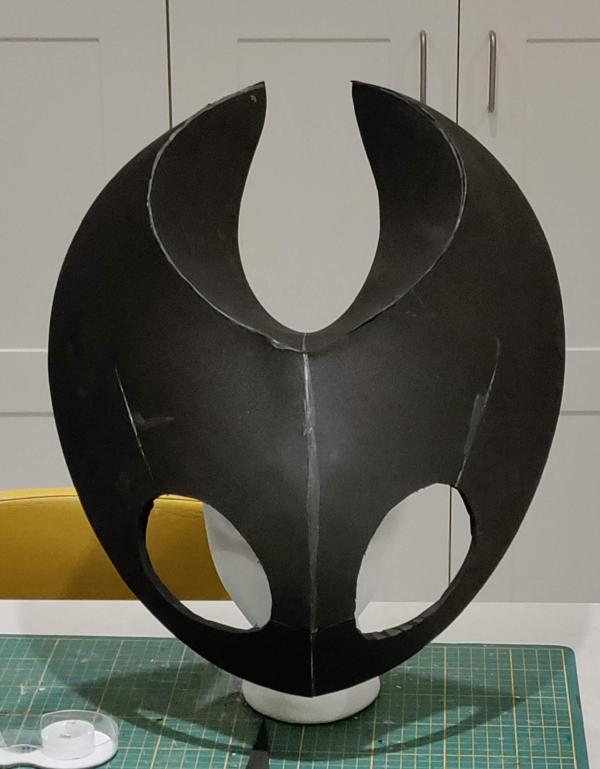
Once I was happy with the pattern, I blew it up to full size and constructed the basic shape of the mask out of 10mm EVA foam.
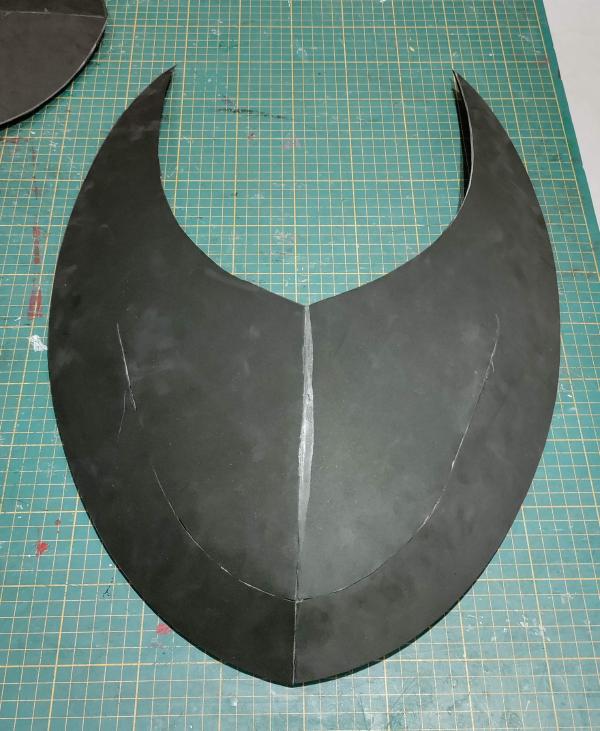
I remember gluing it to be a real pain, especially the very middle between the horns as there’s not really a good place to grab it securely. You can see that the foam is pinched a bit right at the centre as a result of this, and I had to do a fair bit of sanding of that seam later on.
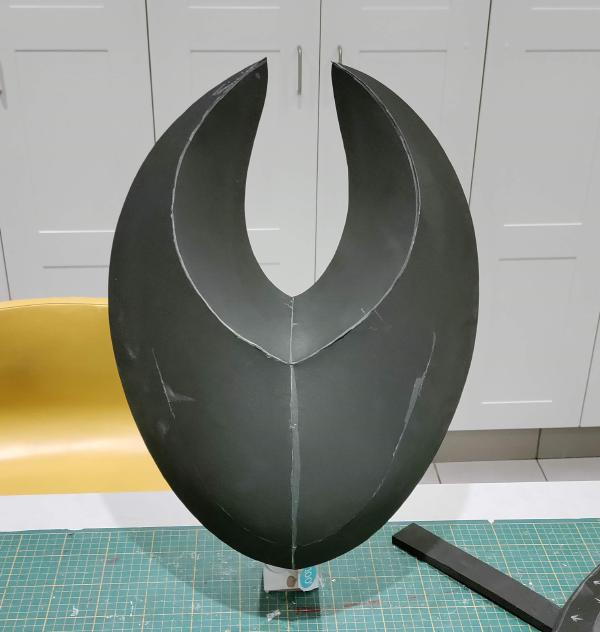
The eyes weren’t on the pattern itself. Instead I cut a shape that looked about right out of cardboard and traced around it on the inside of the mask. Then I cut them out giving me relatively rough but symmetrical eye holes.
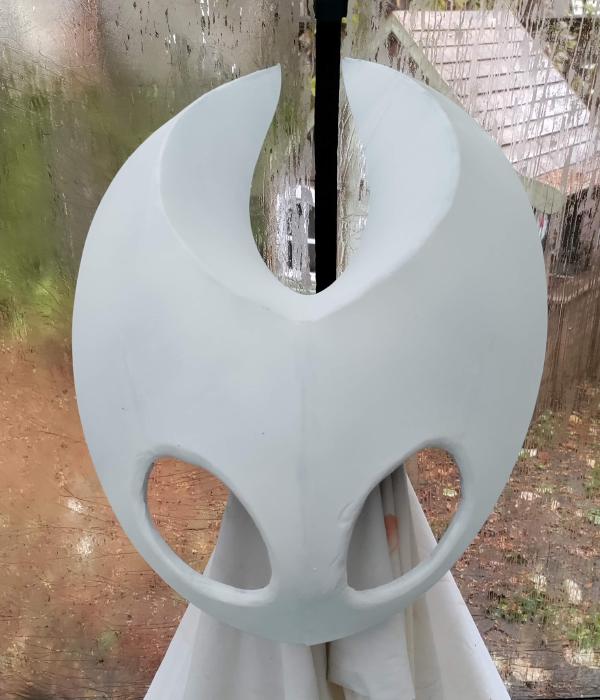
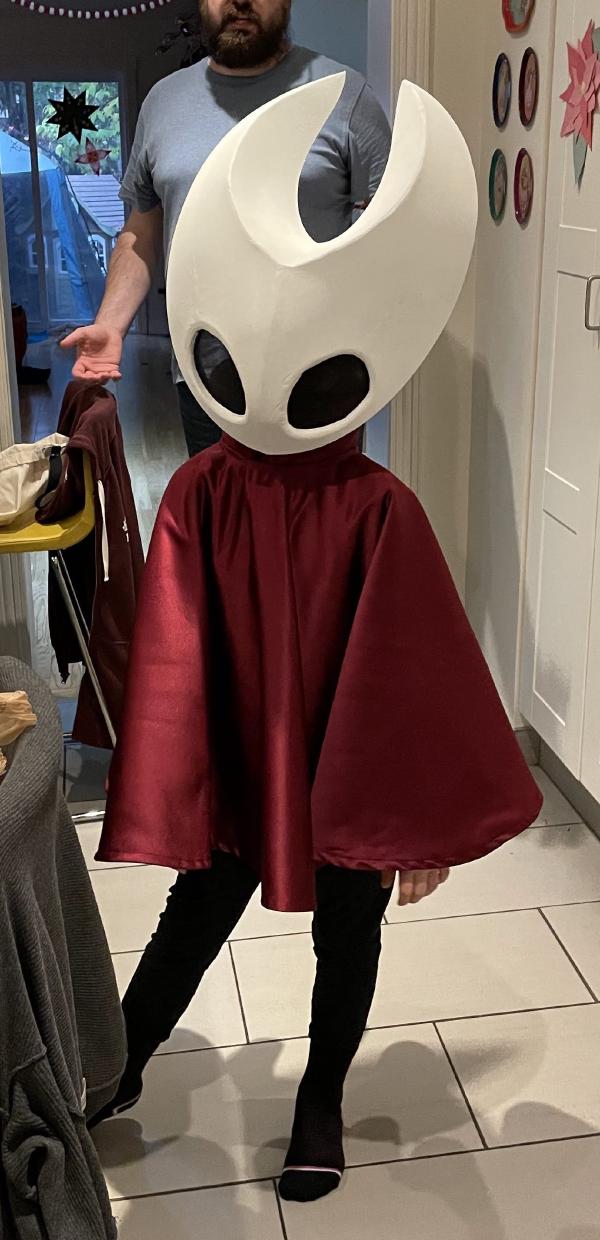
After tidying up and sanding down the seams and eyes, I gave the whole thing several coats of white Plastidip. The masks in the game look like they might be made of bone, so I wanted a matte finish. As it happened the Plastidip gave me the finish I wanted without requiring further painting or a clearcoat.
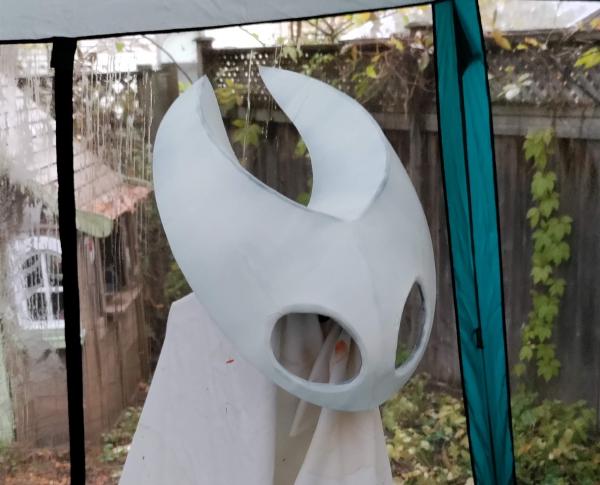
It took several layers to get good coverage, especially as I was starting with black foam underneath. To make matters worse by the time I got to this stage it was the day before Halloween and the weather was awful.
I panic-bought a folding canopy that I could spray under and it really saved the day. I would not have finished on time without it to keep the rain off while I applied the coats I needed.

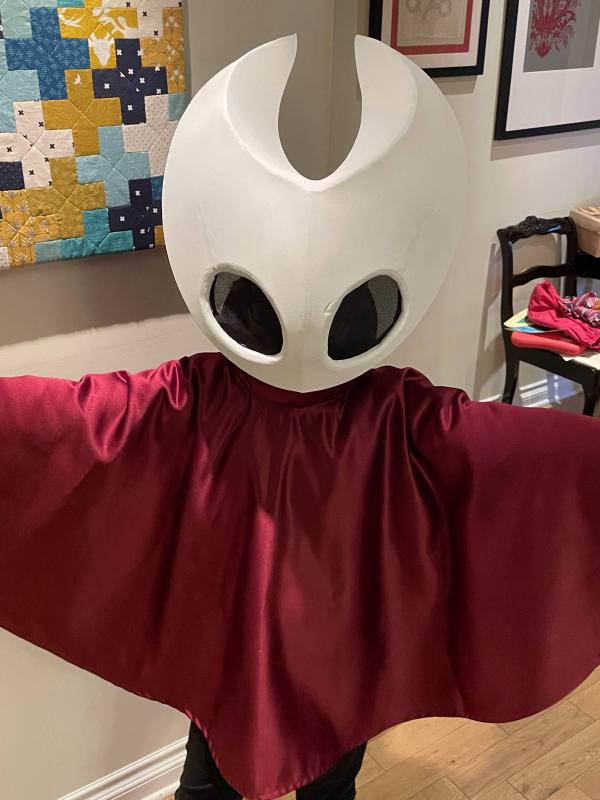
To finish the eyes we added mesh across the back of the holes so that they looked black but could still be seen through. I don’t have any pictures of the progress for this part but here’s Zoe showing off the effect.
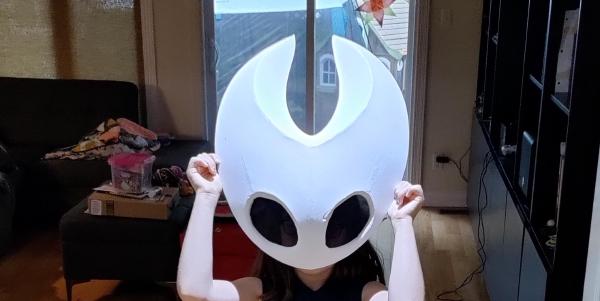
Finally to let her actually wear the mask rather than having to hold it up to her face I made a simple headband out of the same foam as the mask itself and glued it at the front and top.
Mask complete!
Cape and Collar
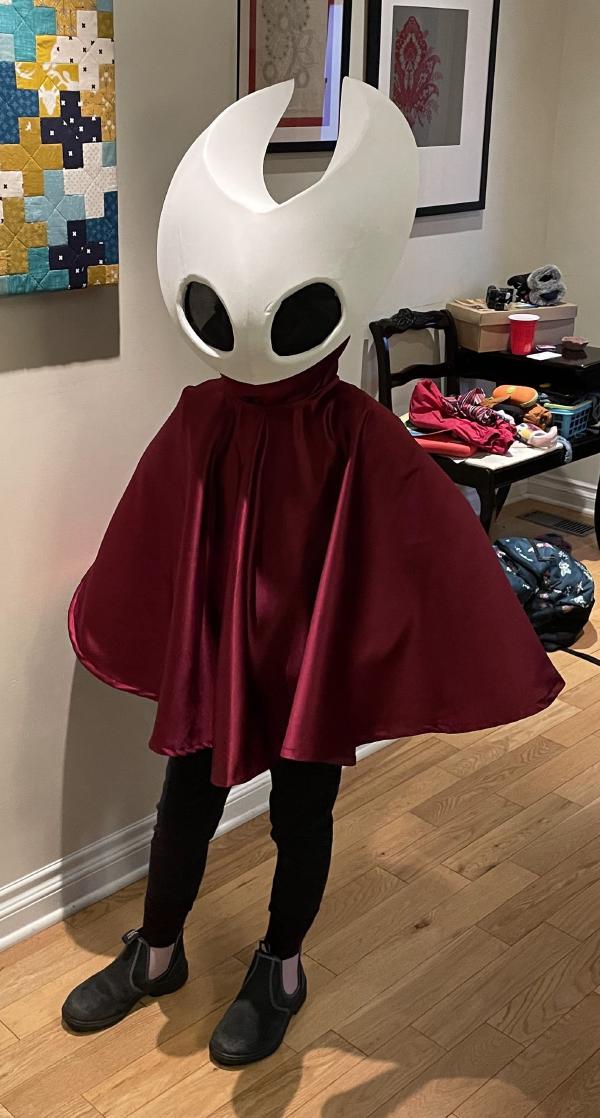
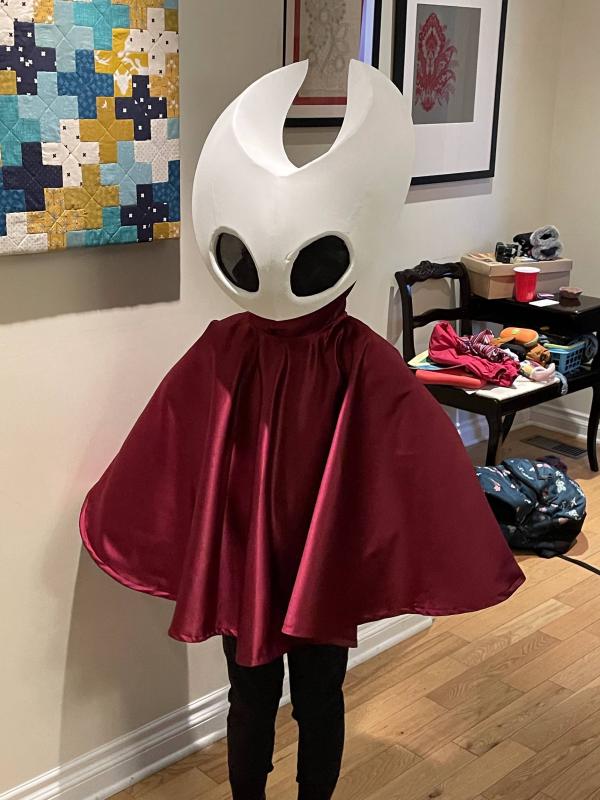
Hornet’s cape and collar are just as big a part of her costume as the mask. I’ve never sewn before but my Mother-In-Law is a wizard apparently as she whipped up a collar and cape that both look absolutely amazing. She made the collar separately as it’s so big that it needed its own internal support material to keep it from drooping. Attaching it to the cape would have been a huge pain and putting it on would have been more difficult too so it stayed separate.
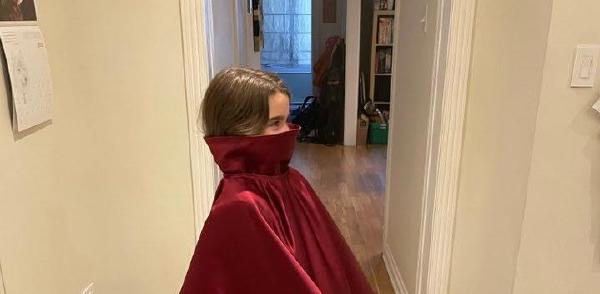
I don’t have progress shots for them since she made them at her house but here’s Zoe trying it on for the first time. Look at that massive collar!
Big thank you to Louise for her help!
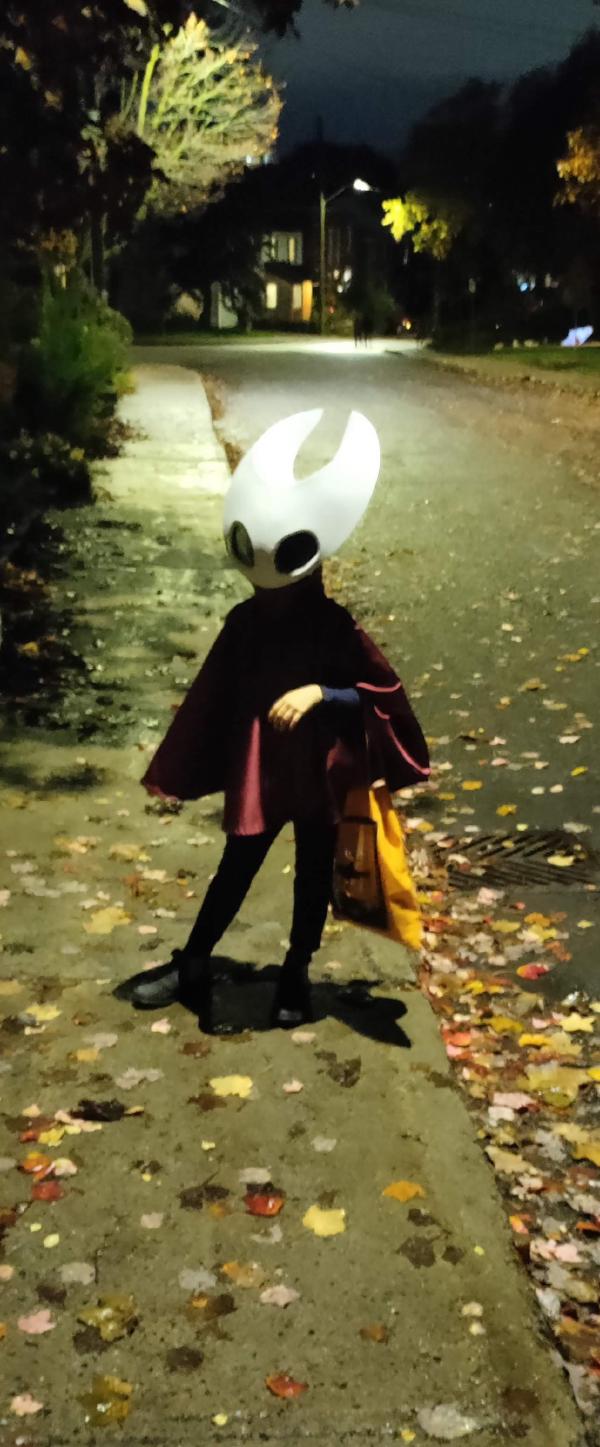
Halloween
Lessons
- Start sooner! This costume came together over about 2 weeks, and it was only finished at 4pm on Halloween itself. I' ve since added a calender event on September 1st reminding me that Halloween is two months away and that I should probably start on a costume! I had to cut plans to build Hornet’s needle weapon as it simply wouldn’t have been finished in time.
- Tidying up seams is important. In the pictures of the finished costume you can see the vertical seam running down the middle of the mask, as well as (to a lesser extent) the diagonal ones above the eyes. I would have liked those to be invisible and will definitely put more work into gluing seams more accurately in the first place and then smoothing or sanding them before painting.
Wrap-Up
At some point I might go back and make the Needle to compliment the costume. My initial design needs refining a fair bit though as it wound up being very thick along the centre of the blade. Maybe when Silksong comes out?
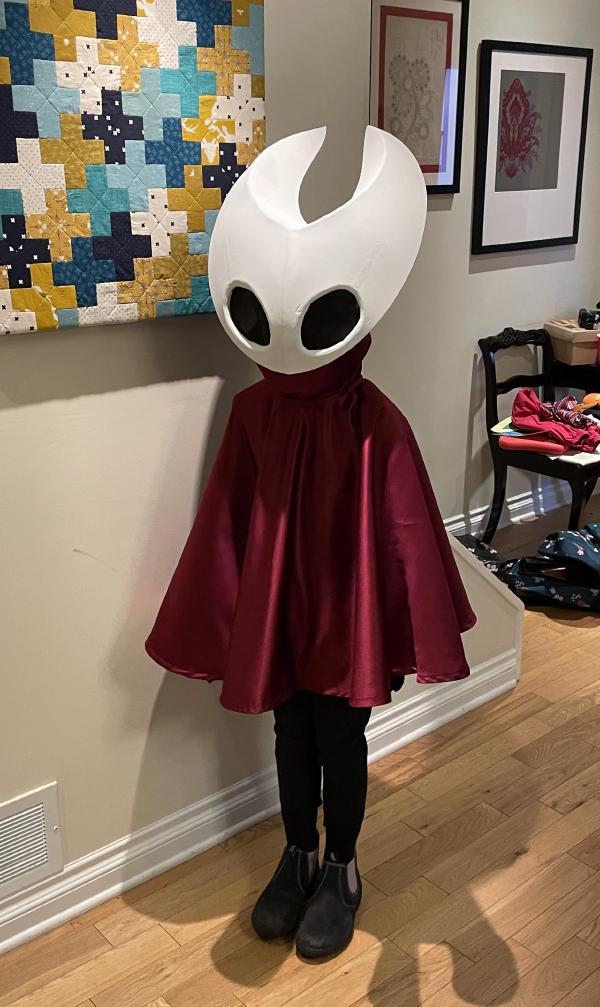
I’m very happy with the costume and Zoe loves it too. She’ll get the mask down from the shelf where it’s on display in the living room and wear it around the house sometimes which always makes me smile.