With the initial pieces fully assembled, I need to figure out how Zoe is going to put them on and actually wear them.
Bracers
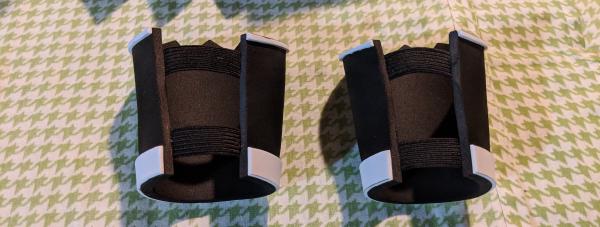
The bracers were the easiest of the three things to add straps to. I had several metres of 12mm elastic so I cut short lengths of it to go between the edges of each bracer.
I experimented with hot glue to attach the elastic but it didn’t pan out since I only have access to a low-temperatire glue gun. It’s fine gluing surface details but this application put way too much strain on the join and it kept popping apart. A high-temperature hot glue gun would likely have done the trick.
Instead I used contact cement, and it worked really well. I was worried that because the elastic can stretch it would pull away from the glue but it was rock solid. That said, I expect that over time repeated stretching will gradually reduce the strength of the join until it fails. Next time I’ll likely sew the elastic onto some nylon webbing and then glue that to the foam to give it long-term sturdiness.
Tiara
I started by using the same technique on the tiara as the bracers, but with a longer piece of elastic that would fit around Zoe’s head. This didn’t work very well though because it was tricky to get just the right length of elastic that wasn’t too loose or tight. In addition, putting the tiara on requires the wearer to part their hair across the back so that the tiara disappears under the top layer and doing this while stretching the elastic proved to be difficult.

Instead I used two velcro strips that are designed for securing wires and power cables. I glued one to each arm of the tiara with the soft side facing inwards (for comfort reasons). The rough side glued surprisingly well to the foam with contact cement.
When putting the tiara on the wearer now has simply to take a strap in each hand and attach them at the back as tight as they like. Much better!
Armour
Plan A: Grommets
My idea for adding straps to the armour went through a couple of iterations. I knew that I wanted to thread the back with elastic cord in a crossover pattern, like a shoe or corset. Following this line of thought, I looked at metal grommets.
Experimenting with small grommets and 5mm foam revealed some problems. First, the grommets I bought are designed for fabric, which is quite a lot thinner than the foam. With 5mm foam there was only a small amount of metal protruding after placing the grommet through the hole and after hammering it down it didn’t have much purchase on the back side.
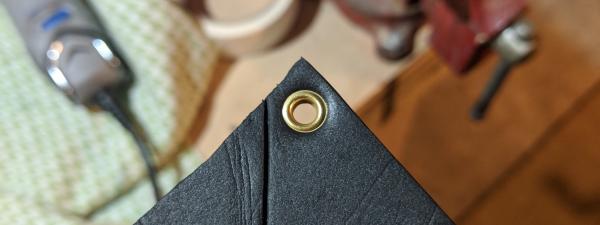

Additionally the grommets tore out of the foam really easily. There was no way they would support the strain required to hold the armour together while being worn.
Plan B: Fabric
Since the elastic straps on the bracers had glued and held really well, I realized I could glue regular fabric with a loop sewn into the end to the inside of the armour. I could then thread the elastic cord through the loop, which would sit proud of the edge of the foam.
I’ve hardly sewn a thing in my life, so I asked my wife to assist. She’s been sewing for ages and knows way more about stitching (both by hand and machine) than I do. She arrived on the solution we used which was to sew a thin tube of fabric and invert it. We then folded each tube in two and my wife sewed the two sides together leaving the loop in the end. The important feature of this design vs a single strip of fabric folded over is that it will not fray at the edges.
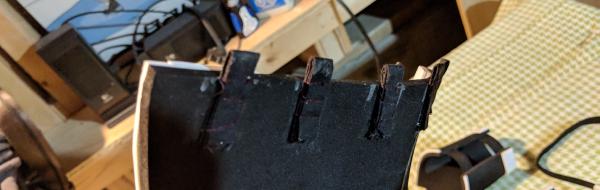
In the image above you can see the fabric loops glued into place. The red thread is holding the ends of the loop together.
I glued five loops to each side of the back of the armour, then threaded them with elastic cord. A cord stop added to the end allows the whole thing to be tightened/loosened. We tested it and Zoe was able to step into the armour, pull it up, and tighten the cord without issue. I’m very happy with how it turned out.
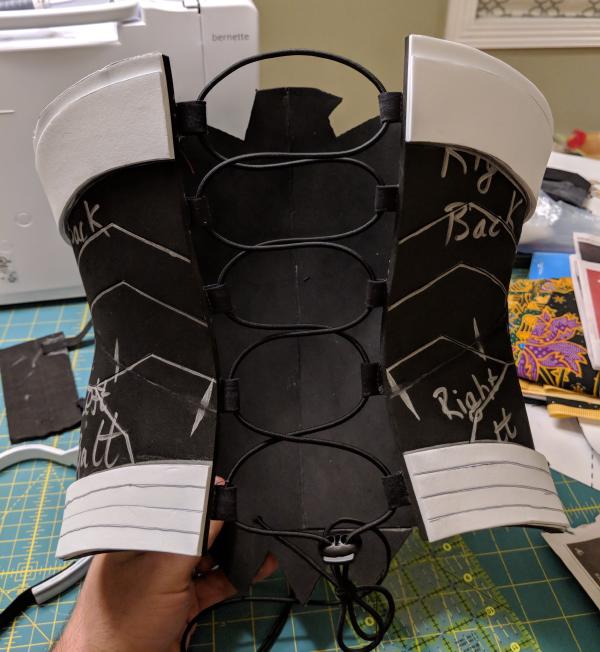
Finally, I decided that we needed to add some shoulder straps to keep the armour from sliding down while being worn. We did this by adding some more fabric loops inside the top of the armour that we can hook transparent bra straps through.
Next Steps
Painting!